WordPress Development Without a Computer

You’re on the train, scrolling through your WordPress site on your phone, and you see an issue that you’d like to fix, for example improvement to the mobile view. Normally you’d make a (mental) note and deal with it when you’re back at your computer.

But what if you could just fix it right there?

With AI coding assistants that run in the browser—like Claude Code, OpenAI Codex, GitHub Copilot Workspace, or similar tools—combined with WordPress Playground for testing, you can now do WordPress plugin development without a computer.

What It Looks Like

AI: I’ve implemented the fix for you, committed and pushed it to Github. Use this link to Test it in WordPress Playground.

This link above just leads to a generic Playground but to give you an idea of the workflow: The AI helps you fix or implement what you asked for and makes the code available in a branch. You’ll then run/view it via Playground. Here’s how to set this up:

What You Need

  • Your plugin or theme in a GitHub repository,
  • A web AI coding assistant,
  • A way to tell the AI how to generate Playground test links that you can click.

The third part is where the Playground Step Library comes in.

Step 1: Create Your Blueprint

WordPress Playground uses blueprints: JSON configurations that describe what to install and how to set things up. You can install plugins, themes, configure settings, import content, and more. Writing these by hand is a little cumbersome, so I built the Step Library as a visual tool to assemble blueprints step by step.

The Step Library also provides more steps than Playground offers natively: that’s where the name comes from. It compiles these custom steps into the native steps that Playground understands. The native steps are powerful but require you to know how to combine them in clever ways; the Step Library’s custom steps make it easier. Examples include addProduct for WooCommerce, addTemplatePart for block themes, a debug step to enable common debug settings and plugins, or disableWelcomeGuides.

Use this special link to the Step Library to start with an “Install Plugin” step. Paste your HTTPS GitHub repository URL. If you want to test a specific branch, add /tree/branch-name to the URL—but for now, just use your main branch. We’ll make the branch dynamic later.

Add any other steps your testing environment needs: maybe WooCommerce if your plugin integrates with it, or some test content, or specific WordPress settings.

Step 2: Generate AI Instructions

Once your blueprint is ready, open the “Copy/Share” dropdown and select “Generate AI Instructions”. This creates a markdown snippet you can add to your project’s CLAUDE.md, .github/copilot-instructions.md, or similar AI instruction file:

The generated instructions tell the AI to include a Playground testing link at the end of its responses. The branch name in your URL gets replaced with a BRANCH_NAME placeholder, so the AI knows to substitute the actual branch it’s working on.

Step 3: Add to Your Repository

Copy the generated markdown and add it to your AI instruction file. Commit it to your repository. Now any AI assistant that reads these instructions will include Playground links when it makes changes to your code.

Bonus: you can also instruct your coding assistant to add such a file to your repo!

The Workflow

Here’s what this looks like in practice:

  1. Open your AI coding assistant on your phone (or desktop),
  2. Connect to your GitHub repository,
  3. Describe what you want to change or fix,
  4. The AI makes the changes and pushes a branch,
  5. Tap the Playground link in the response,
  6. Test the changes in Playground—if it’s a private repo, you’ll authenticate with GitHub here,
  7. If it works, create a PR and merge it—you got to test before even opening the PR.

It’s a complete development loop. The AI handles the code, GitHub handles version control, and Playground handles testing. Your phone is just the interface tying it all together.

Private Repositories

Until recently, this workflow only worked with public GitHub repositories. I submitted a PR to WordPress Playground that adds GitHub OAuth authentication. Now when you load a plugin from a private repository, Playground prompts you to authenticate, and then it works just like public repos.

Beyond Mobile: Preconfigured Test Environments

The mobile workflow is a fun demo, but the same setup is useful on desktop too. The real power is in the preconfigured Playground environments through blueprints (which you can easily create with the Step Library).

Say your plugin integrates with WooCommerce. You can create a blueprint that installs WooCommerce, sets up a test product, and installs your plugin from the current branch. Now every Playground link the AI generates loads an environment where you can actually test the integration—not just whether your plugin activates without errors.

Or you want to test across different configurations: multisite vs single site, classic editor vs block editor, different PHP versions. Create a blueprint for each scenario, generate AI instructions for each, and you have a test matrix that’s one click away.

GitHub Actions

You can take this further with a GitHub Action that posts a Playground link “Try it in Playground” as a comment on every PR. That way anyone reviewing the PR can test the changes without setting up a local environment.

The Step Library is available as an npm package, so you can integrate it into your own tooling and CI pipelines.

Let AI Create Blueprints for You

Something often overlooked: the Step Library is also useful for getting AI to help you create blueprints in the first place. The native Playground steps are low-level—things like writeFile and runPHP—so AI assistants often don’t grasp what’s actually possible with blueprints. The Step Library’s high-level steps are more intuitive, and with a JSON schema that describes them, AI can easily understand what’s available and generate useful blueprints.

Other New Step Library Features

Some notable other things I added recently:

wp-env.json import: Drop your .wp-env.json into the Step Library and it converts your local dev environment config into a Playground blueprint.

GitLab, Bitbucket, and Codeberg support: Not everyone uses GitHub. The Step Library now recognizes repository URLs from these platforms.

Paste detection: Paste a plugin URL, some PHP code, or even an existing Playground URL, and the Step Library figures out what it is and creates the right steps.

Try It

The Playground Step Library is where you can create your blueprint and generate AI instructions.

I’ve found myself using this on the train, in waiting rooms, wherever I have a few minutes and an idea I want to try. It’s not how I imagined WordPress development would work, but it does.

Submitting Patches to Github with WordPress Playground

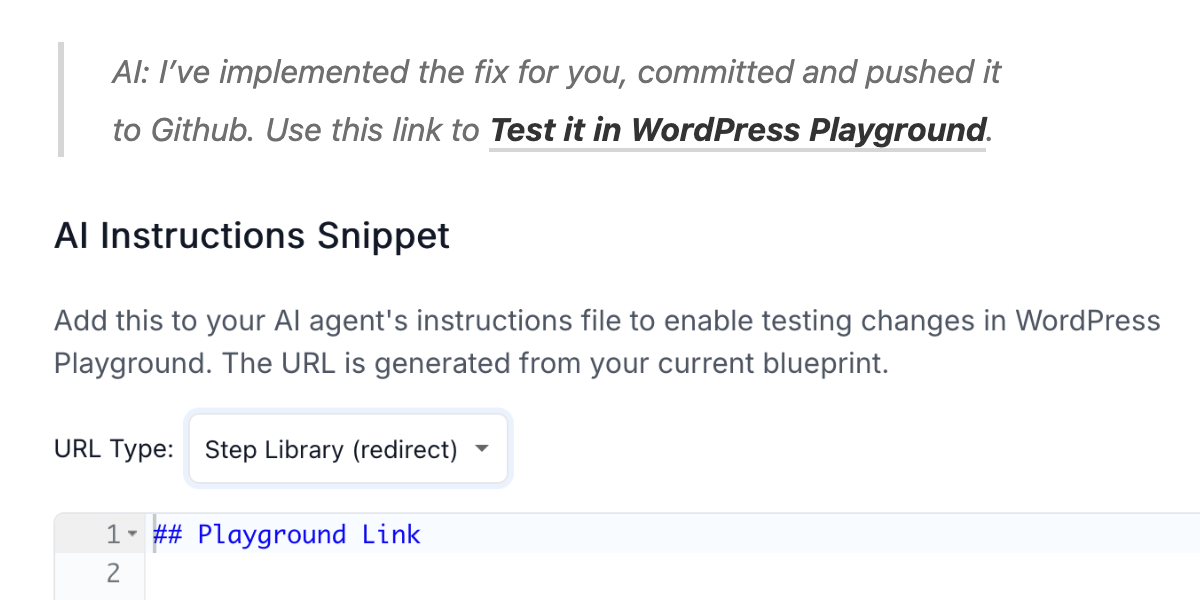
Today, I’d like to talk about a new step I added to the WordPress Playground Step Library that makes it easier to configure WordPress Playground in a way that you can easily submit Pull Requests to the Github repository where the project is hosted.

What is the Step Library? It is a tool that makes it easier to create a so called Blueprint for WordPress Playground that boots WordPress in your browser window according to your needs.

The specific step I introduced is called the githubTheme step. It will run a theme from a Github repository.

Additionally, and this is mostly following guidance from Nick Diego for his own Nautilus theme, by ticking a checkbox, it will configure Playground in a way that you can submit Pull Requests through playground (open this setup in the step library):

Screen Recording

So after creating the blueprint, there are a number of steps to take until you arrive at your PR. To show this better, I created a Screen Recording but below I also extracted some screenshots and commented them. This is the Pull Request created in the video, and here is also the playground link that the step library generated so that you can try it out yourself.

The screencast actually shows how I first missed the right button but then demonstrates that you can also update PRs.

Screenshots from the Recording

Here are some screenshots from the video (omitting my mistake):

First, you connect to your Github Account (I had already done this, so this just proceeds)
In the Site Editor, I can then change the color palette like this
Then I use the Create Block Theme plugin to save the changes to the theme
And press “Save Changes”
Choose to export the Pull Request to Github
And give some details before submitting it to Github
This is now the final Github Pull Request

How does it work?

It is amazing what WordPress Playground can do: it runs WordPress in your browser, so there is a virtual filesystem to which the Create Block Theme can write its file changes. The

Already in November 2023, Adam Zielinski published the GitHub Pull Request submission flow but only recently Nick Diego showed me how practical this is for theme developers. The only downside: it takes quite a lot to configure:

  1. You need a blueprint to run your theme from Github,
  2. Make sure that the Create Block Theme plugin is installed, and finally
  3. Configure a set of URL parameters for Playground to let it know where the PR should go, which directory to export etc.

The Step Library makes this more accessible by automatically setting those query parameters for you. It’s then also easy to add more steps, just try it out, using the above as a basis!

If you want to read a bit more about the Step Library, I recommend reading my previous post on it.

As of now, I wouldn’t call the flow simple: you need to be taught steps on how to submit changes. But when you know them, submitting a PR to a WordPress theme can be done without any server infrastructure! I think this is fascinating!