Have you ever hesitated to install a new WordPress plugin, worried about whether it would meet your needs? Likely, many potential users of your plugins feel the same way.
As a WordPress user myself, I greatly value the ability to “try before you buy” when it comes to plugins. Fortunately, by the way of WordPress Playground, users can easily test plugins via a “Live Preview” feature of the WordPress.org Plugin Directory.
Of course, it was always possible to test a plugin before installing it on my own blog: I would have a dedicated testing site somewhere, later there were services like TasteWP where you could get a “throwaway WordPress” for a few days to install a plugin.
Take a look at the screenshot below to see what the “Live Preview” button looks like in the plugin directory. Have you already seen one or even tried it? Unfortunately, currently only a small number of plugins offer it. Let’s change that–I encourage you to make your plugins one of them!

Theoretically, WordPress Playground can run any plugin from the WordPress.org Plugin Directory by using a URL like https://playground.wordpress.net/?plugin=pluginslug.
So, why doesn’t the plugin directory offer the Live Preview option by default? When the feature was first introduced, it actually did. But there was significant pushback because many plugins require specific configuration to be properly showcased—similar to how a theme needs to be set up to “look like the demo.”
Live Preview = Commit a blueprint.json + Enable It
As stated in the documentation, you need two steps to add the Live Preview button to your plugin:
- Create a Blueprint and commit it to SVN in the location
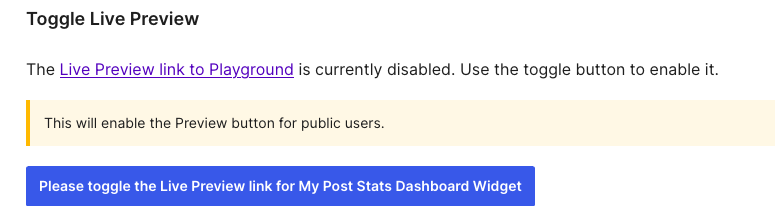
assets/blueprints/blueprint.json - In the Advanced section of your WordPress.org Plugin page, go to the Toggle Section and enable it:
Creating a Blueprint
A Playground blueprint—though the name may change, as Matt Mullenweg mentioned at WordCamp Europe—is a JSON file that configures WordPress Playground in a certain way before it becomes available to the user.
A blueprint.json file consists of a few declarative statements and of a steps array that is executed in sequence. There are a number of native steps available that you can use to install plugins or write files.
Writing the blueprint.json
As a developer, likely JSON is not an unfamiliar format which you can just create in your editor. A JSON schema is available to validate your blueprint.json, and a Blueprint Builder offers an in-browser text editor with autocompletion.
Playground Step Library
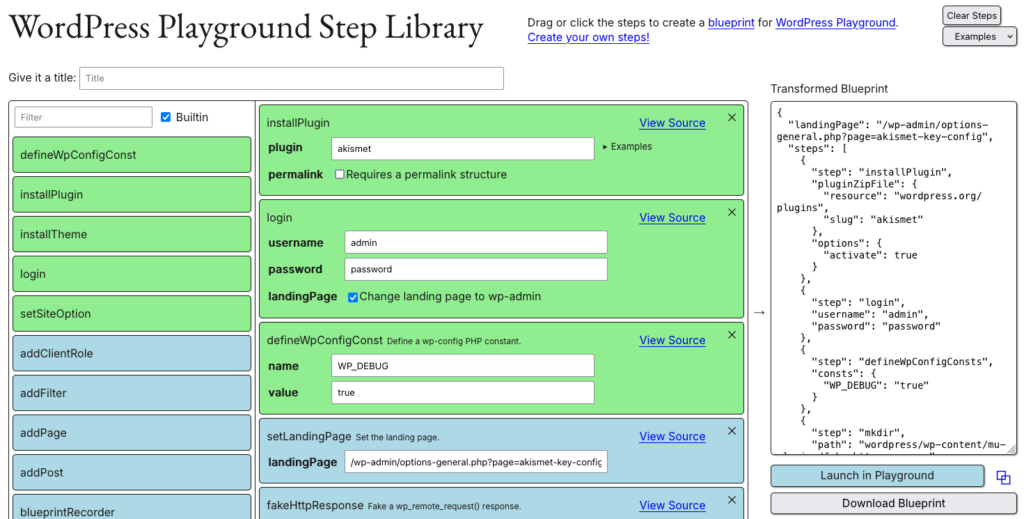
On this blog, I previously mentioned the Playground Step Library, which I created it as a visual way for building blueprints because “JSON files can be tedious to write and easy to get wrong.” But it doesn’t stop there.
I think of the available Blueprint Steps as if they were machine code. They are quite generic and powerful but it can be hard to understand what you can actually achieve with them.
Thus, the Step Library offers “virtual steps” that do more sophisticated things and “compile” to existing blueprint steps.
The ability to use these more complex operations with a single step can inspire you about what you can achieve with a blueprint. Here are some examples:
- addFilter: Add code to filter a hook provided by WordPress or a plugin.
- addPage: Save the content of a page and optionally set it as the homepage.
- addPost: Create a post with a certain post type and optionally register that post type at the same time.
- fakeHttpResponse: Respond to a wp_remote_request with arbitrary data inside playground.
- showAdminNotice: Can be used to explain to the user what’s going on.
You don’t need the Step Library for any of these but it makes it very convenient and accessible. In the resulting blueprint you can also see how it achieves the tasks if you are curious and need to adapt them to your needs.
Provided with these tools, let’s continue to actually creating a blueprint.json for your plugin. What should you focus on?
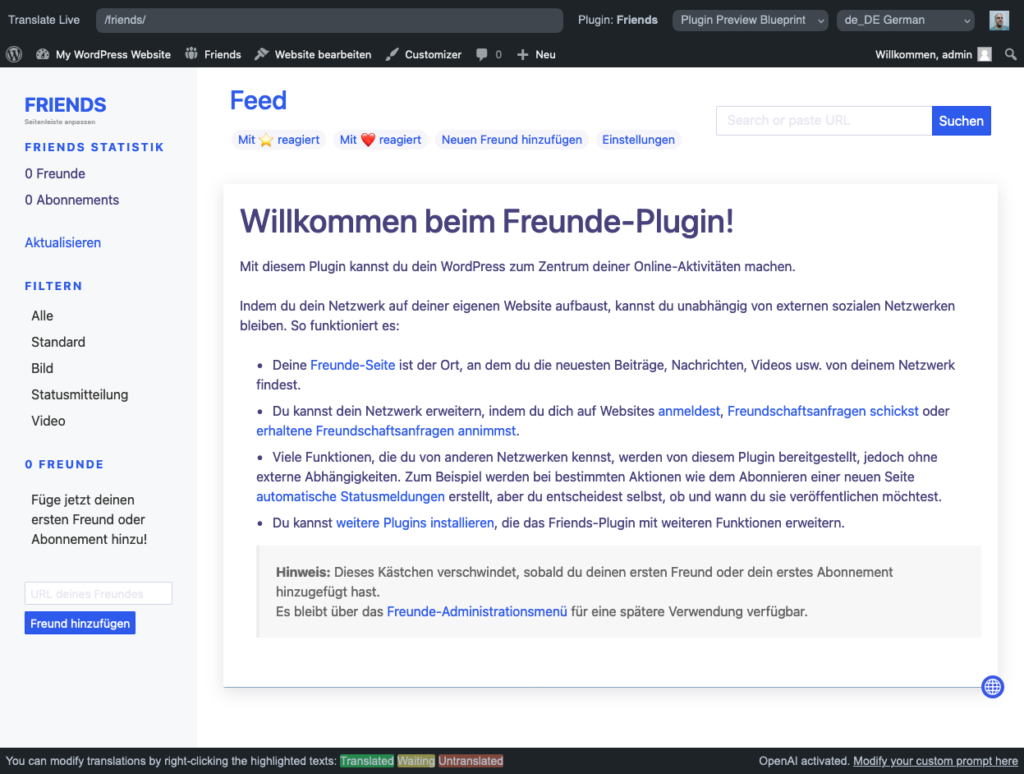
Tip 1: Provide a landingPage URL
Even if your plugin doesn’t need a lot of setup, likely it has a settings page or some other page where you first explain what your plugin is for. By default, a blueprint will take you to the site’s front page, so you should change the landing page it to the page where your plugin shows it’s call to action.
{
"landingPage": "/friends/",
[...]
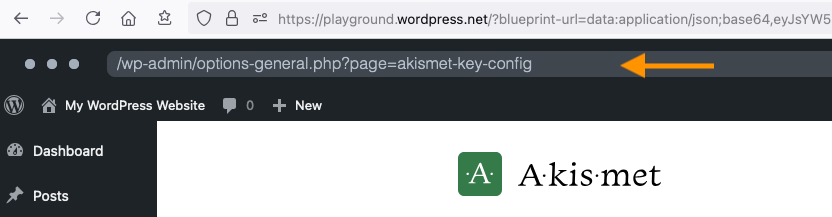
}In the Step Library, you can use the setLandingPage step to set it. A good way to get the URL is to open your plugin in Playground and navigate to the right page. Playground will show you the URL you need to use in its fake address bar.
Tip 2: Add Demo Data and Dependencies
It heavily depends on what your plugin does, but similarly to when you take screenshots of your plugin they become meaningful when you show data.
You can either directly run SQL statements to insert your test data, or you can import a WXR file.
If your plugin needs another plugin to run, you can use the installPlugin step to do so before installing yours.
Tip 3: Overcome Playground Limitations
Communication with Your Servers
Because WordPress Playground runs inside your browser, it is limited by the security restrictions of JavaScript. For example, you can only make cross-domain requests when the endpoint supports CORS.
So if your plugin needs to talk to your servers, you could enable CORS on those endpoints. But possibly this is not desirable to you, for example because you depend on user credentials.
Another solution is to use the fakeHttpResponse of the step library: Just by using WordPress hooks, it will respond to an HTTP request with the desired (demo content) response.
As it can be a bit tedious to identify which HTTP requests need a fake response, the fakeHttpResponse will report in the error log what it did not fake because it had no respective response available.
So to start off, you can just add an empty fakeHttpResponse step and then look at the error log for which requests you need to supply.
If you have to fake large HTTP responses, or a large number of them, you can use a ZIP file to supply the responses as TXT files outside of the blueprint (with the filename being the URL with .toLowerCase().replace( /[^a-z0-9-_]+/gi, '-' ).replace( /-+$/g, '' )).
Replay Your Own Configuration
Sometimes your user needs to go through a setup wizard before they can actually see the functionality. Maybe this is desireable because you also introduce the user to what the plugin does.
On the other hand, you are asking a user who is likely still in “passive mode” to do more than just click around in your plugin. Thus, it can make sense to rather provide a blueprint that already has the plugin configured. Just how?
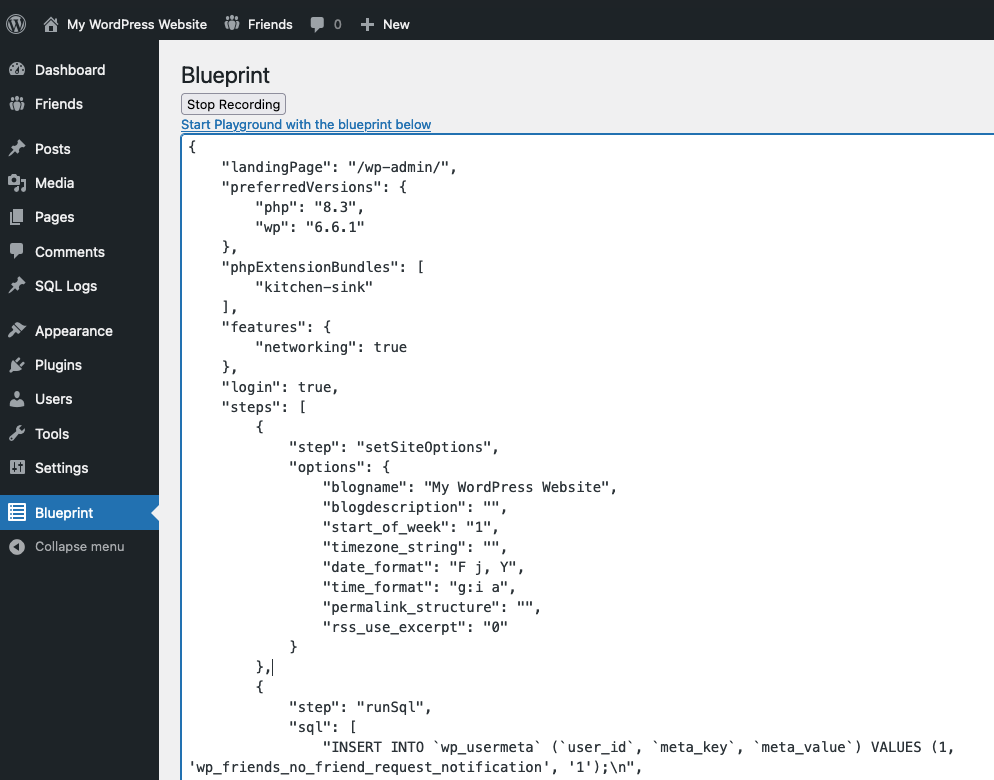
Of course, you could figure out all the things that your plugin does during setup (like the options it sets etc), or you could use the blueprintRecorder step of the Step Library. It installs my blueprint recorder plugin alongside your plugin which will log all SQL inserts and updates made as you interact with your WordPress. Then, via the Blueprint menu item, you can see the blueprint it needs to bring back WordPress to the current state.
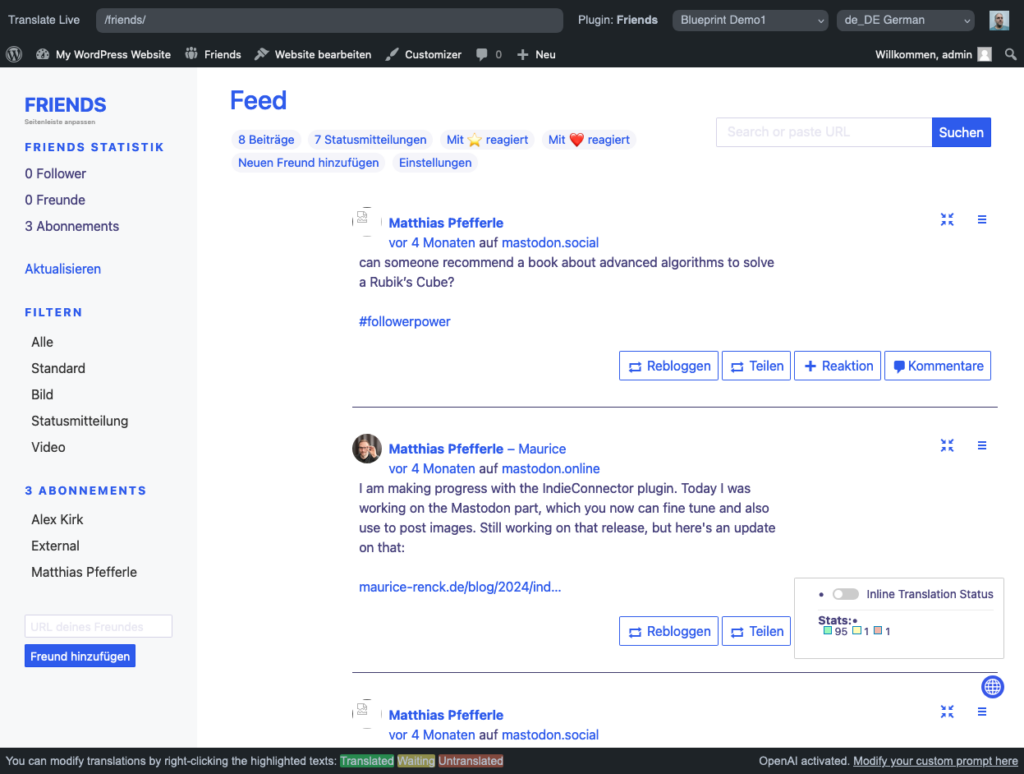
Bonus Tip: Provide Multiple Blueprints
Although the WordPress.org Plugin Directory only supports one blueprint.json for Live Preview at the moment, it can make sense to work creating a few of them that showcase different parts of your plugin.
For example, in Translate Live there is already support for this: with a dropdown on the top right you can choose between all available blueprints for the plugin being translated. Especially for that use case, it can be very useful not to have to go through configuration before you can actually translate the plugin using inline translation.
I think of Blueprints of interactive screenshots. You can use Playground links with different blueprints already today from your own product pages.
I hope that the WordPress.org Plugin directory will support multiple blueprints at some point. But to do that, many more plugins should show what a great way it is to showcase themeselves!
If you have a plugin listed in the WordPress.org directory, I encourage you to take a few minutes to create a blueprint and enable Live Preview. Not only will you enhance your plugin’s listing, but you’ll also empower users to easily try it out!
Leave a Reply
Only people in my network can comment.